
Build VSCode Development Env into Docker
*The following is the translated content generated by OpenAI GPT. The translation is not perfect and may contain errors. Please refer to the original content for the most accurate information.*
Recently, there have been a large number of courses that require the use of a Linux development environment, but I don’t want to install Debian on my main desktop computer. I want to find a way to remotely develop on a Linux machine. VNC, which is commonly used for Linux support, is severely limited by network quality and has high latency, so it was abandoned. Therefore, I chose to use VSCode with SSH to connect to a remote server as the development environment. At the same time, Docker allows for easy switching between different development environments without affecting the host machine.
Server Configuration
I recently bought a mini-server with an Intel N100 CPU. It has low power consumption and noise, making it ideal for hosting services in a room. The configuration is as follows:
- CPU: Intel N100
- RAM: 16GB LPDDR5
- SSD: 256GB
- NIC: 2x 1000Mbps Ethernet
This configuration is very suitable as a personal mini-server and has dual network ports, which can also be used as a software router if needed.
This is not an advertisement
Dockerfile
The most important step is to complete the Dockerfile, which can be configured as follows:1
2
3
4
5
6
7
8
9
10
11
12
13
14
15
16
17
18
19
20
21
22
23
24
25
26
27
28
29
30
31FROM python:3.11.5-bookworm as builder-image
ARG SSH_PASSWORD
ARG SSH_PUBLIC_KEY
COPY requirements.txt .
RUN pip install --default-timeout=1000 --no-cache-dir -r requirements.txt
WORKDIR ./app
COPY . .
RUN apt-get update -y \
&& apt-get install -y libaio1 vim nano openssh-server locales
RUN echo "root:${SSH_PASSWORD}" | chpasswd
RUN echo "${SSH_PUBLIC_KEY}" >> /root/.ssh/authorized_keys
RUN chmod 600 /root/.ssh/authorized_keys && chmod 700 /root/.ssh
RUN sed -i '/en_US.UTF-8/s/^# //g' /etc/locale.gen && locale-gen
# Set environment variables for the locale for haskell
ENV LANG en_US.UTF-8
ENV LANGUAGE en_US:en
ENV LC_ALL en_US.UTF-8
EXPOSE 8088 22
CMD service ssh restart && tail -f > /dev/null
And the directory structure is as follows1
2
3
4
5WorkingFolder
├─ Dockerfile
├─ requirements.txt
├─ docker
└─sshd_config
- python:3.11.5-bookworm: Base image, you can choose the development environment you need as the base image. Here, we use Python 3.11.5 + Debian 12.
- requirements.txt: Packages that need to be installed for Python, add as needed.
- sshd_config: SSHD configuration file, you can copy it from your own Linux machine.
- Installed software: You can add the packages you need to install after
apt-get install.
Building Docker
You can package Docker using the following command:1
docker build --build-arg SSH_PASSWORD=${{ secrets.SSH_PASSWORD }} --build-arg SSH_PUBLIC_KEY="${{ secrets.SSH_PUBLIC_KEY }}" -t ${{ secrets.DOCKERHUB_USERNAME }}/${{ secrets.REPO_NAME }}:latest .
- secrets.SSH_PASSWORD: The SSH password to be used.
- secrets.SSH_PUBLIC_KEY: The SSH public key certificate to be used.
- secrets.DOCKERHUB_USERNAME: DockerHUB username (can be removed if not needed here).
- secrets.REPO_NAME: DockerHub repository name.
- latest: Can be replaced with the desired tag.
Note the last period, which cannot be omitted; it indicates building from the current directory.
If you only need to build and run locally, you can replace ${{ secrets.DOCKERHUB_USERNAME }}/${{ secrets.REPO_NAME }}:latest with <image-name>:<tag>.
Running Docker
Create a persistent volume:1
docker volume create --name <volume-name>
Run Docker:1
docker run -d -v <volume-name>:/root -p 8022:22 <image-name>:<tag>
Replace the missing portions as needed.
Since the SSH password and public key certificate have been generated, SSH can be connected directly using the certificate.
VSCode Configuration
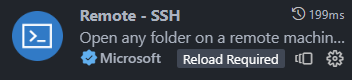
Open VSCode and install the “Remote SSH” extension.
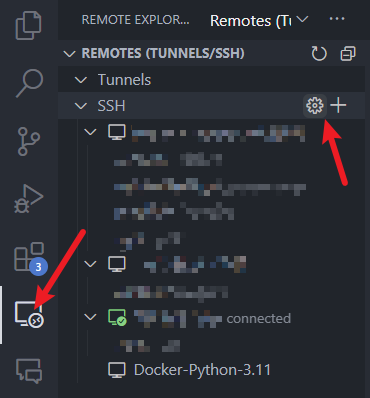
Click on the “Remote” menu in the middle of the left-hand sidebar and then click on the gear icon.
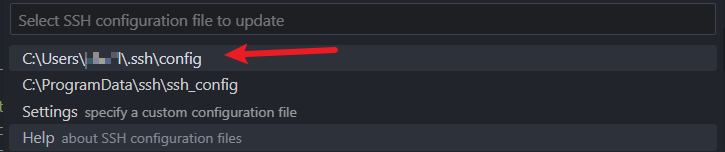
Click on the first configuration file.
Add the following configuration at the end:1
2
3
4
5
6Host Docker-Python-3.11
HostName 192.168.10.5
User root
Port 10001
PreferredAuthentications publickey
IdentityFile "D:\ssh_keys\dockerssh"
Modify the IP, port, user, and certificate according to your own configuration.
VSCode can only use certificates to avoid entering a password for each login. If you use password SSH, you need to enter the password every time you connect.
SSH Key Permissions
VSCode requires strict permission control for the private key stored on the client.
For Linux users, you can execute the following command:1
chmod 400 ~/.ssh/<private_key>
For Windows users, you can use the following PowerShell script:1
icacls "privateKeyPath" /grant :R
Replace the path accordingly.
Then navigate to the private key file in Windows Explorer, right-click, and select Properties. Go to the Security tab > Advanced > Disable Inheritance > Remove all inherited permissions from this object.
Done
At this point, the basic operations are completed. You can use the terminal in VSCode to execute commands and install various VSCode extensions.
You can also upload to GitHub and configure GitHub Actions for automatic builds.1
2
3
4
5
6
7
8
9
10
11
12
13
14
15
16
17
18
19
20
21
22
23
24
25
26
27
28name: Docker Build and Push
on:
push:
branches:
- main # Trigger the workflow on push to the main branch
jobs:
build:
runs-on: ubuntu-latest
steps:
- name: Checkout code
uses: actions/checkout@v2
- name: Login to DockerHub
uses: docker/login-action@v1
with:
username: ${{ secrets.DOCKERHUB_USERNAME }}
password: ${{ secrets.DOCKERHUB_PASSWORD }}
- name: Build Docker image
run: |
docker build --build-arg SSH_PASSWORD=${{ secrets.SSH_PASSWORD }} --build-arg SSH_PUBLIC_KEY="${{ secrets.SSH_PUBLIC_KEY }}" -t ${{ secrets.DOCKERHUB_USERNAME }}/${{ secrets.REPO_NAME }}:latest .
- name: Push Docker image
run: |
docker push ${{ secrets.DOCKERHUB_USERNAME }}/${{ secrets.REPO_NAME }}:latest
This script will automatically upload to DockerHub. Note to configure GitHub variables.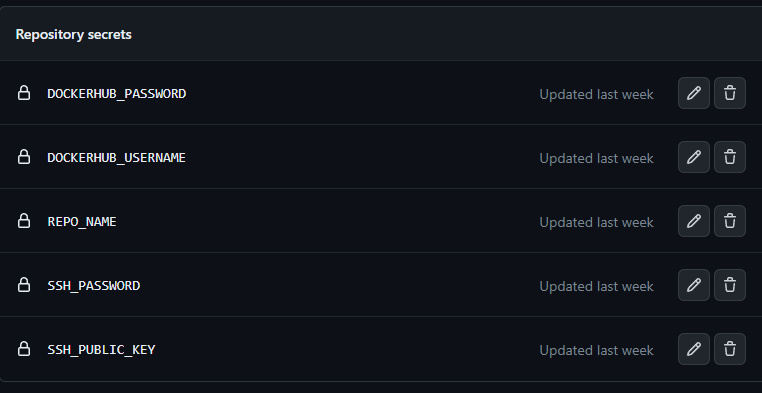
You can upload according to your own needs to the Github registry or other Docker repository management.
For specific information, you can refer to the repository: here
Enjoy!!